
How to use Ace Proxies on AdsPower
With each passing day, making money online requires more and more technical savvy. The evolution of antifraud systems of major platforms for certain resources makes it a must to have reliable proxies and an antidetect browser at hand. In this article, we will introduce a reliable proxy service, Ace Proxies, and show you how to set up their proxies in AdsPower.
What is Ace Proxies
Ace Proxies is a proxy service founded in 2017. It was created initially to provide HTTP/HTTPS proxies for one particular niche. This niche of users is in need of proxies in conjunction with bots to buy a limited edition of sneakers and clothing.
Ace Proxies is a good option if you're looking to buy private proxies. They provide secure anonymous proxies. You can easily get around filters and unblock restrictions using their proxies.
Your online freedom will be increased by their dedicated proxies because they are well masked. Additionally, there are two budget-friendly plan options available with private proxies.
Consider data center dedicated proxies if you require high speed and unlimited bandwidth usage. Here, you can find quick and effective dedicated proxies. You should take into account the residential brokers if you need rotating proxies that instantly change IPs in response to user requests. The proxies rotate at a set time by default, but you can change it whenever you like.
Hightlights of the Ace Proxies service:
- 99.8% Uptime Guaranteed
- No File/Image Restriction
- Reliable Customer Support 24/7
- Automatic & instant delivery
- High Anonymity
- Compatible with all browsers & devices
- Unlimited and unmetered bandwidth
- HTTP/HTTPS/SOCKS supported
How to set up a proxy from Ace Proxies in AdsPower?
1. Enter the personal dashboard on Aceproxies.com, and buy a proxy according to your own needs. 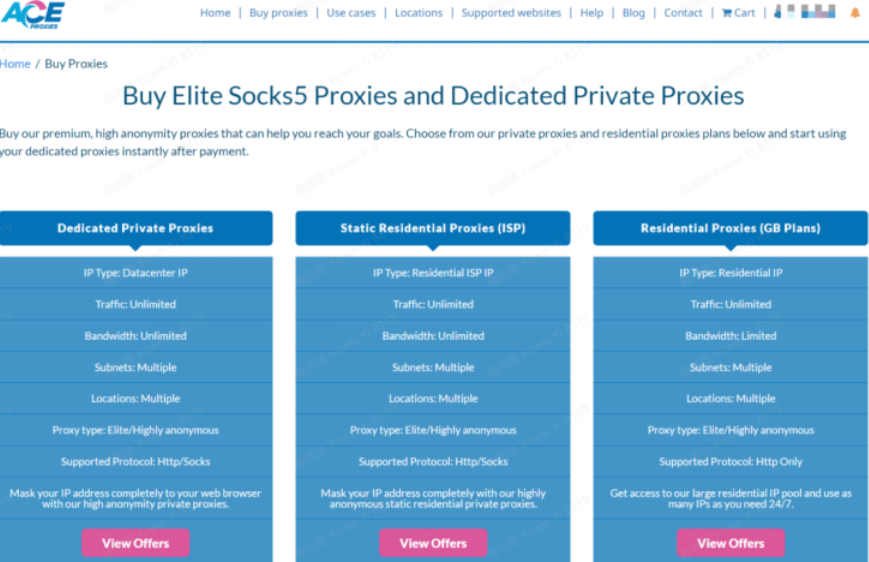
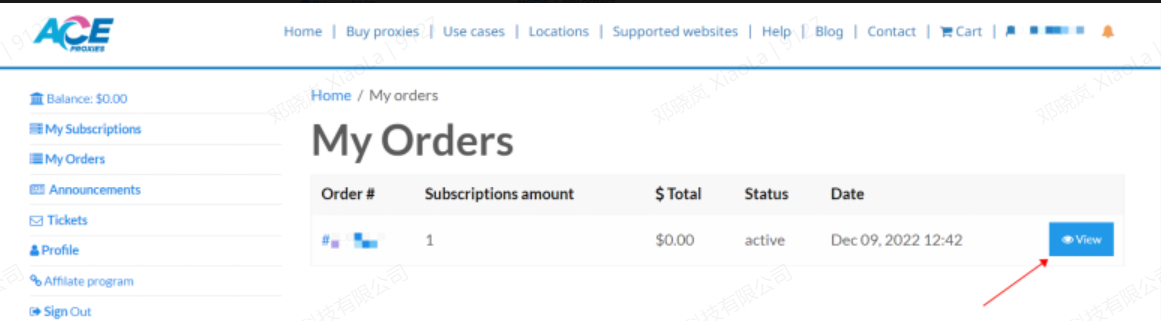
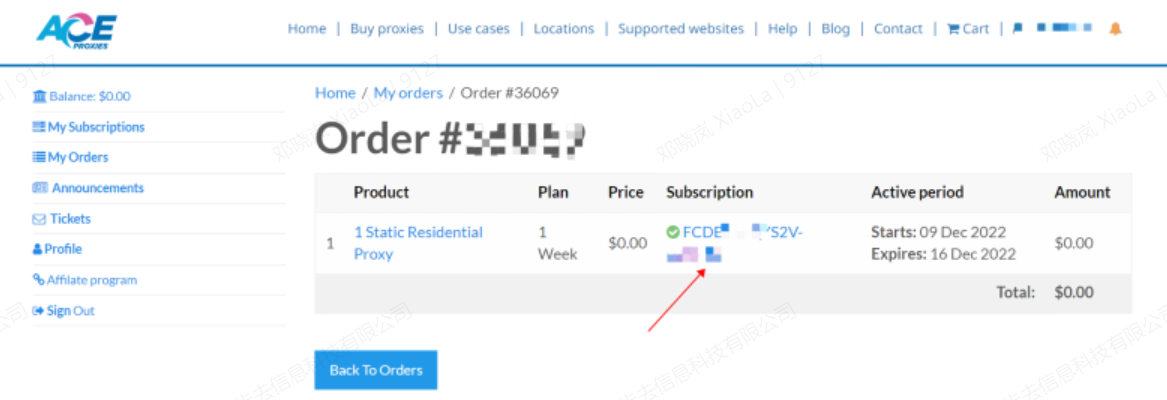
2. View and download the proxy information you just bought in “My Orders”.

3. Downloadthe AdsPower program and log in.
4. Click on the “New Profile” button to create a new profile
5. Choose the proxy type
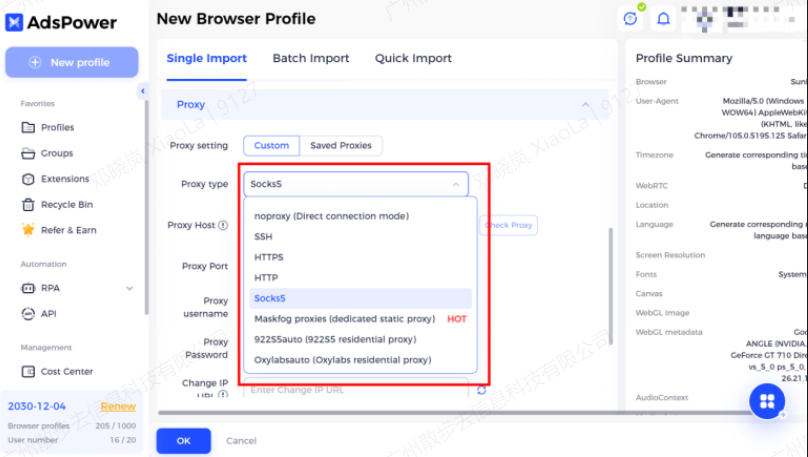
6. Fill in the proxy information and check how it works by clicking on the “Check proxy” button; all done!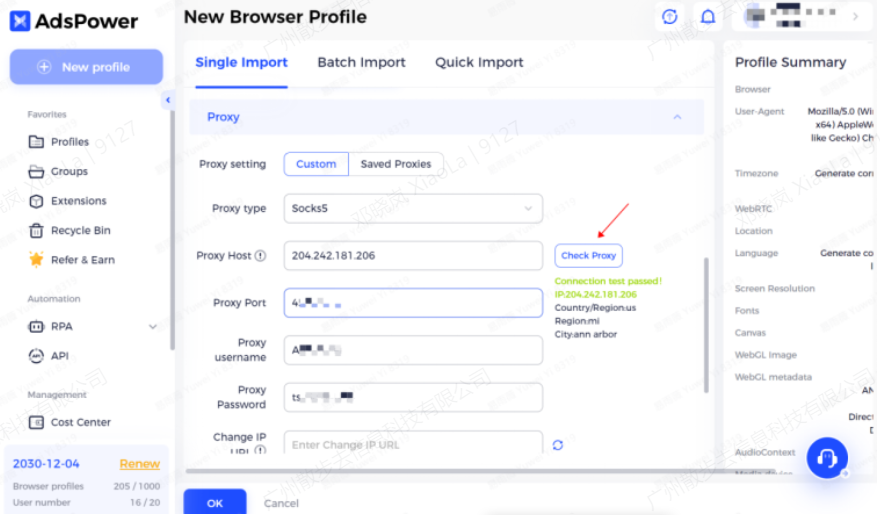
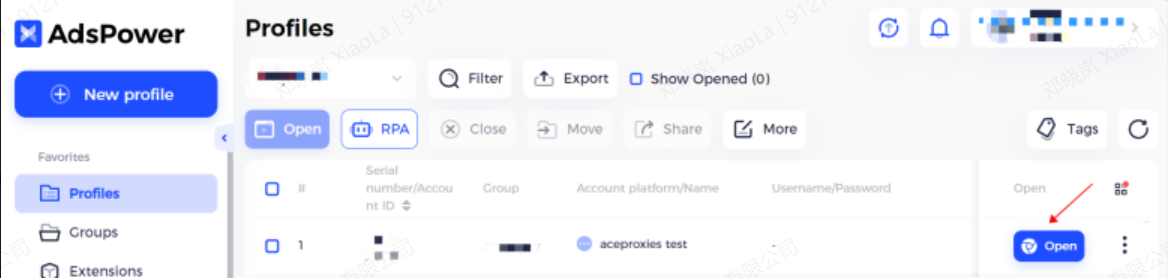
7. Click on the “Open” button to launch the profile.
8. Now you can get down to work!

People Also Read
- IPcook Review: A Practical Proxy Option for AdsPower Users

IPcook Review: A Practical Proxy Option for AdsPower Users
Discover why IPcook is the go-to choice for affordable proxies. Learn more about its high-quality residential, ISP, and datacenter proxies in review
- Top 7 Facebook Agency Ad Account Providers in 2026

Top 7 Facebook Agency Ad Account Providers in 2026
Looking for the best Facebook agency ad account to scale your campaigns? Here are the top 7 providers, including high-trust options for every budget.
- Why Meta Agency Ad Accounts are the Ultimate "Cheat Code" for Scaling

Why Meta Agency Ad Accounts are the Ultimate "Cheat Code" for Scaling
Learn how Meta Agency Ad Accounts help advertisers scale faster with fewer restrictions, while AdsPower improves account management and stability.
- How to Manage Multiple Social Media Accounts Safely in 2026: The Complete AdsPower Guide

How to Manage Multiple Social Media Accounts Safely in 2026: The Complete AdsPower Guide
Safely run multiple social media accounts in 2026 with aged accounts & AdsPower anti-detect browser. Master fingerprint isolation, proxy setup
- IPRoyal Review 2026: A Proxy Solution for Modern Multi-Accounting

IPRoyal Review 2026: A Proxy Solution for Modern Multi-Accounting
Explore our IPRoyal review 2026. Learn about IPRoyal pricing, proxy safety, and how to use these ethical residential IPs with AdsPower for secure mult
