
Meta Muse, Meta’s new autonomous AI agent, is only available in limited regions. This 2026 guide presents four tested registration workflows, with AdsPower anti-detect browser as the top pick. We also cover alternative approaches including Gemini Spark, cloud phone and cloud desktop for you to gain access to Muse AI.
Meta Muse represents a major leap in autonomous AI agents. Unlike regular chatbots, it can carry out multi-step tasks, browse online resources and handle routine workflows in the background. If you are eager to try this powerful agent but keep running into sign-up barriers, this practical guide walks you through several proven methods to get your account set up.
What Is Meta Muse
Meta Muse is Meta’s new AI agent built with long-term memory and autonomous task execution capabilities. Unlike conventional chatbots, Muse runs its tasks in the background even after you close the conversation window. It can browse the web, sort emails, schedule plans and complete multi-step workflows across different online services on your behalf.
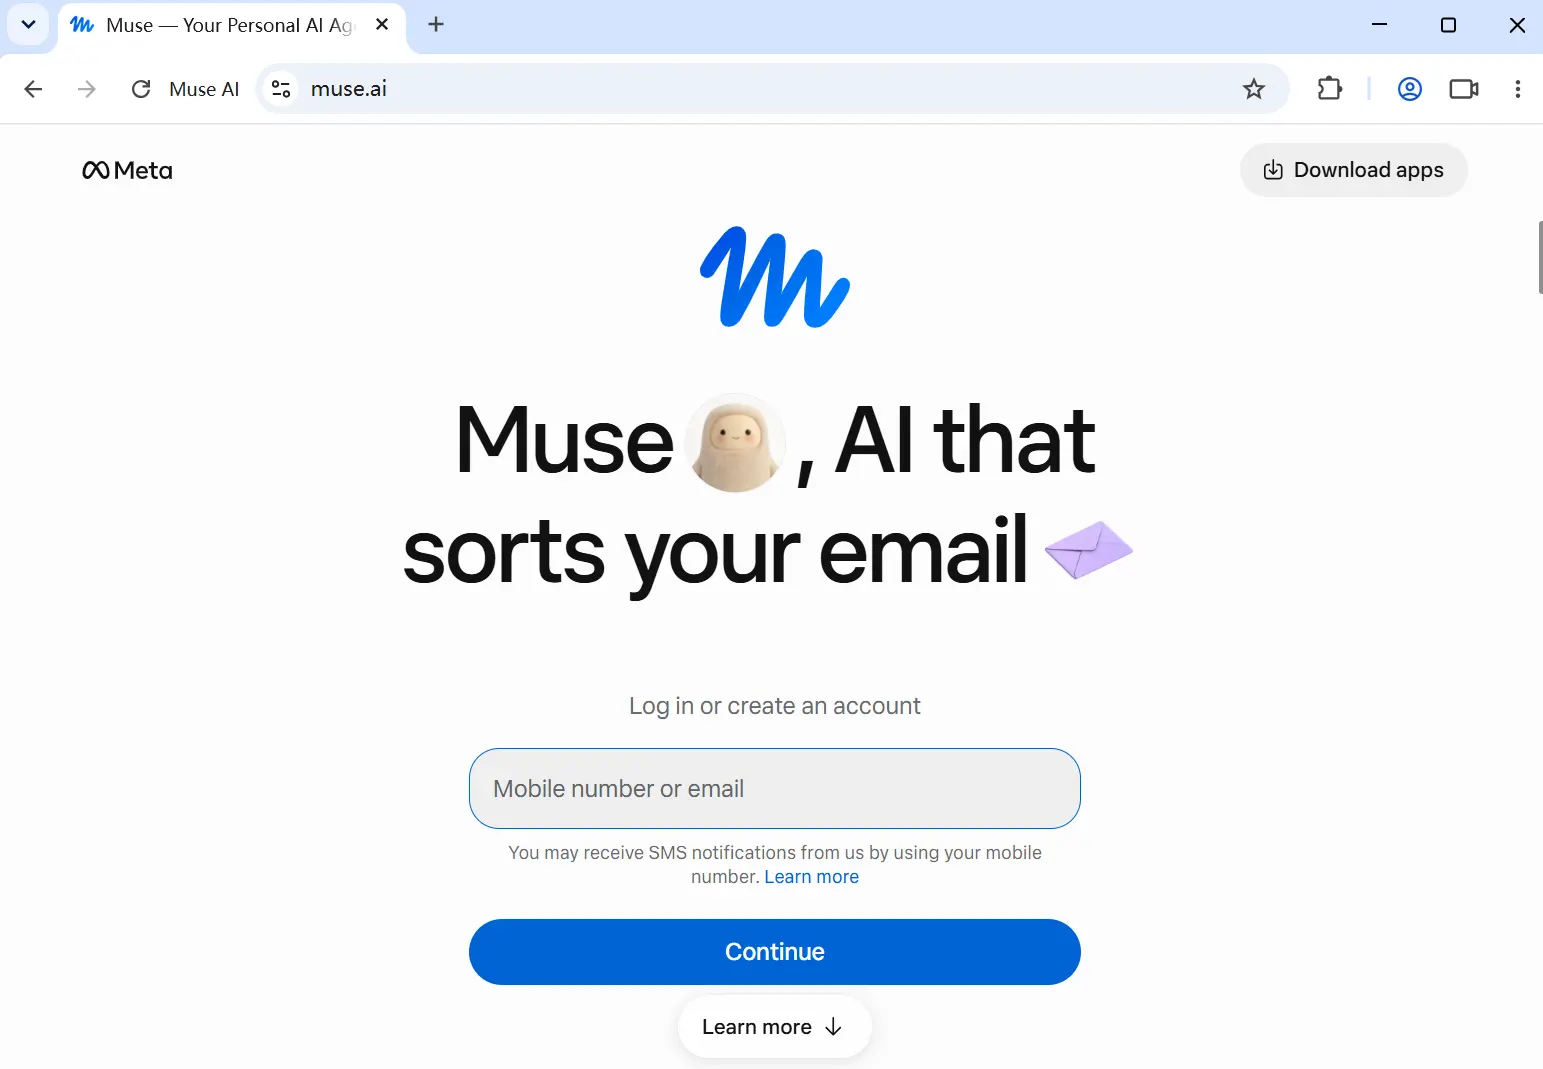
While Muse delivers powerful automation features, many users run into obstacles during sign-up. Meta enforces location checks and age verification. Even with a US-based IP, you may be placed on the official waitlist or required to complete extra identity checks.
Muse Official Availability
Availability has expanded since launch, and it will keep changing. As of this update:
- United States and Canada: available since the September 2026 launch
- Singapore: available as of late October 2026, with local connectors including Shopee, Grab, Singapore Airlines, Agoda, ShopBack, Klook, Trip.com, and Lazada
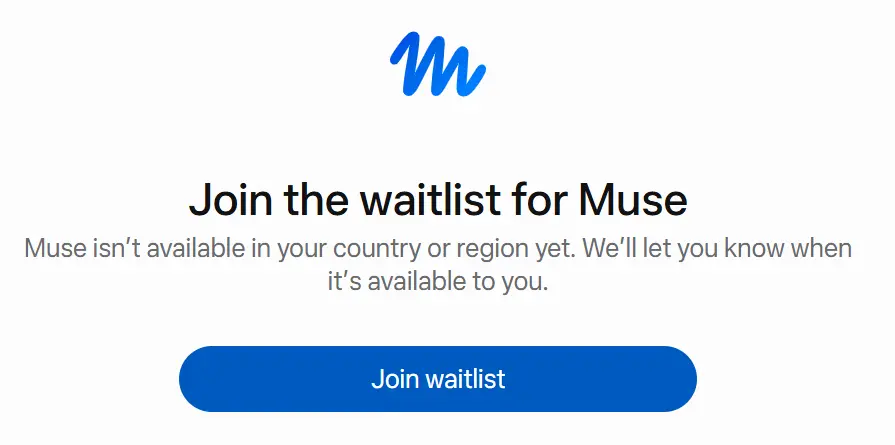
For other regions, it has not yet available. If you visit from an unsupported region, you will typically see a waitlist prompt. To solve this, AdsPower can help you register with an US residential IP. Belowing are four verified ways to create a Muse AI account.
Overview of Four Methods
We have tested four practical methods to register a Muse account, each suited for different tools, budgets and use cases. You may pick one based on the resources you already have on hand.
- AdsPower fingerprint browser + US residential IP: our recommended option for stable, long-term multi-account management
- Gemini Spark remote browser: good choice if you already hold a Google AI Pro or Ultra subscription
- Cloud phone: convenient for users who prefer mobile environments
- DaDesktop cloud desktop: ideal if you want a full remote Windows environment without installing software locally
Method 1 (Recommended): Register Muse with AdsPower Fingerprint Browser & Residential IP
AdsPower isolates each browser profile with independent fingerprints, cookies and proxy connections. It is widely used by e-commerce operators to reduce detection risks when managing multiple online accounts. AdsPower offers a free tier, while residential proxies are purchased separately and charged by the provider. This setup delivers better stability for long-running Muse agent accounts.
Step-by-Step Walkthrough
1. Prepare a residential IP
- You already have a US residential IP: If you have purchased a residential proxy before, use the connection details provided by your service provider. These usually include the proxy address, port, protocol, and optional login username and password.
-
You do not have a US residential IP yet: If you haven’t bought a US residential IP, you can purchase a proxy directly within the AdsPower client. Open the AdsPower client and go to Proxies → Buy Proxy.
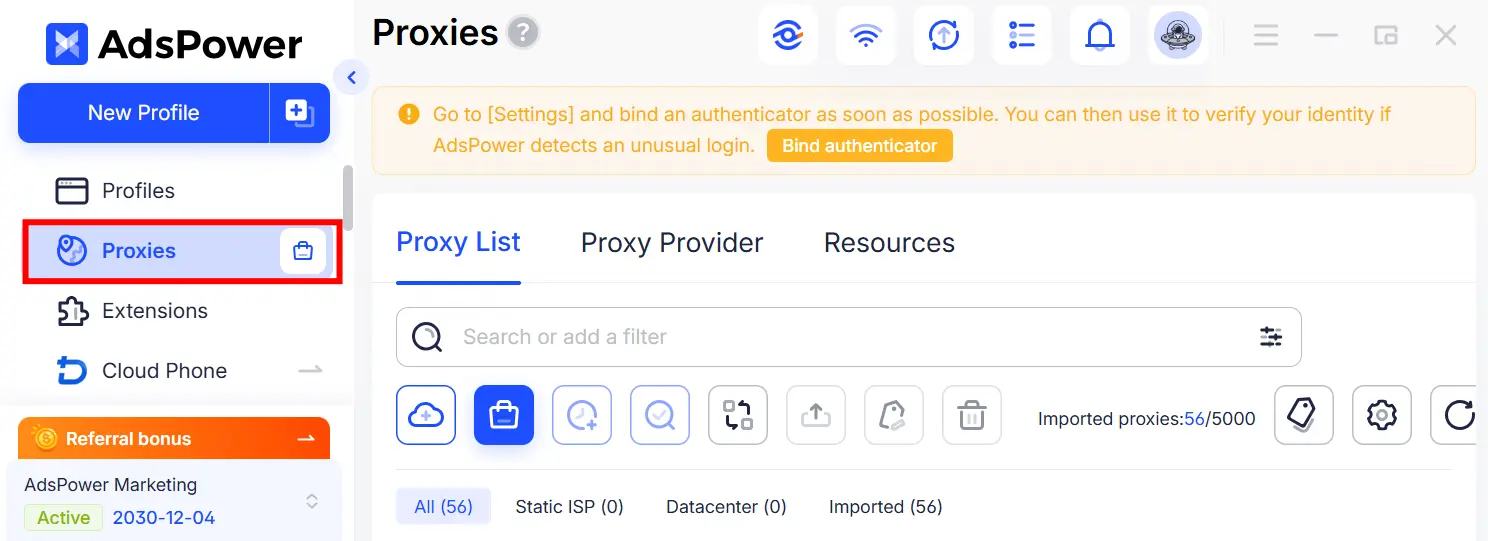
On the purchase page, select your proxy type, country or region, quantity, and subscription duration based on your needs. For this setup, choose a static ISP residential proxy and set the location to the United States.
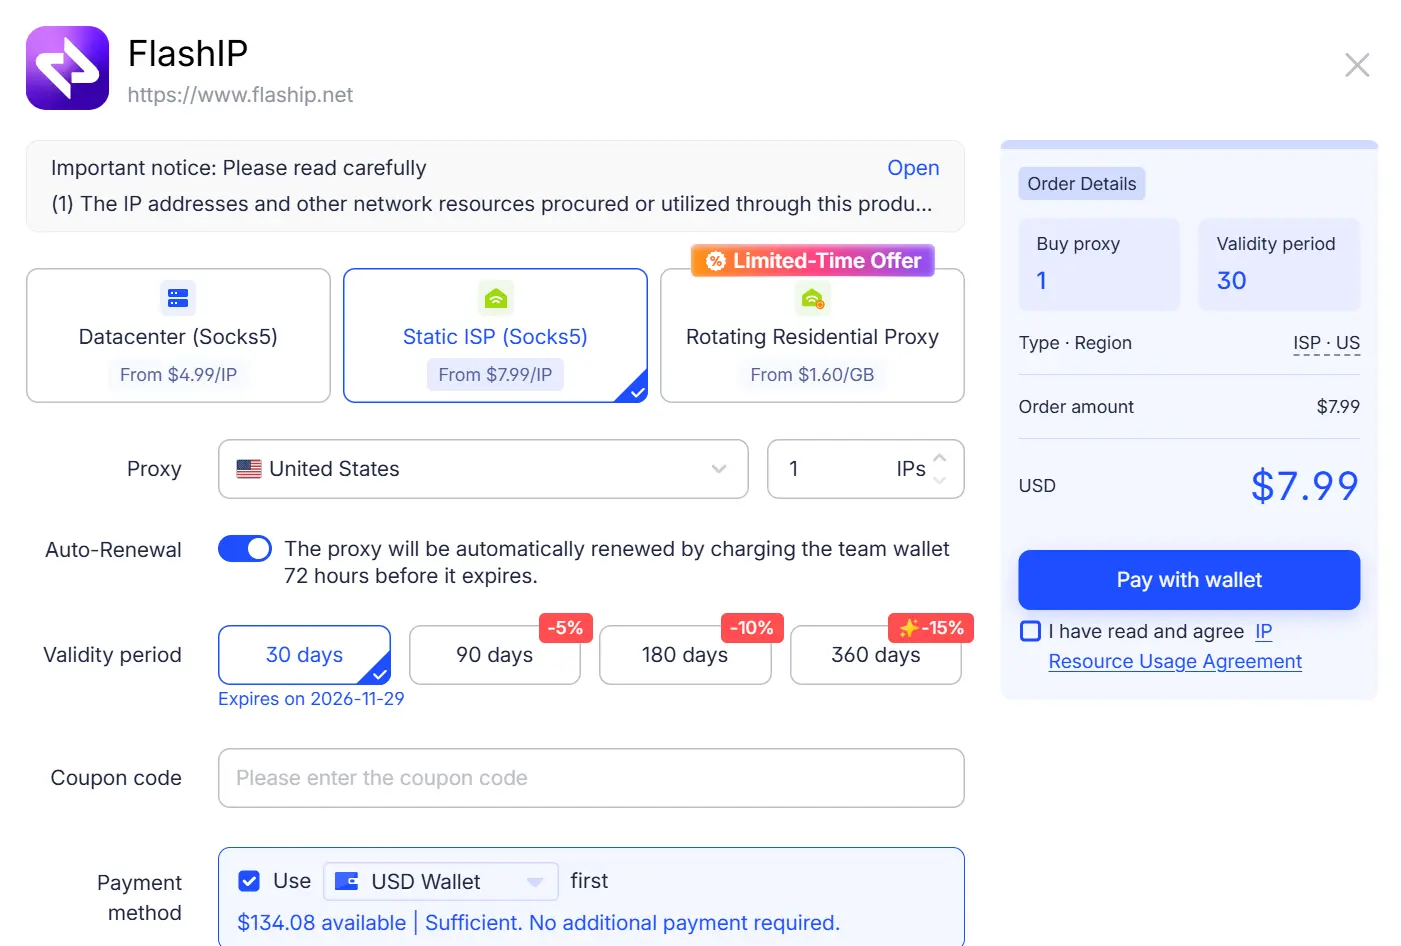
Once the purchase is complete, the proxy IP will be automatically added to your proxy list in AdsPower. No manual configuration is required.
2. Create a new browser profile for Muse
Click "New Profile" and enter a profile name such as Muse-AI. Select SunBrowser as the browser kernel.
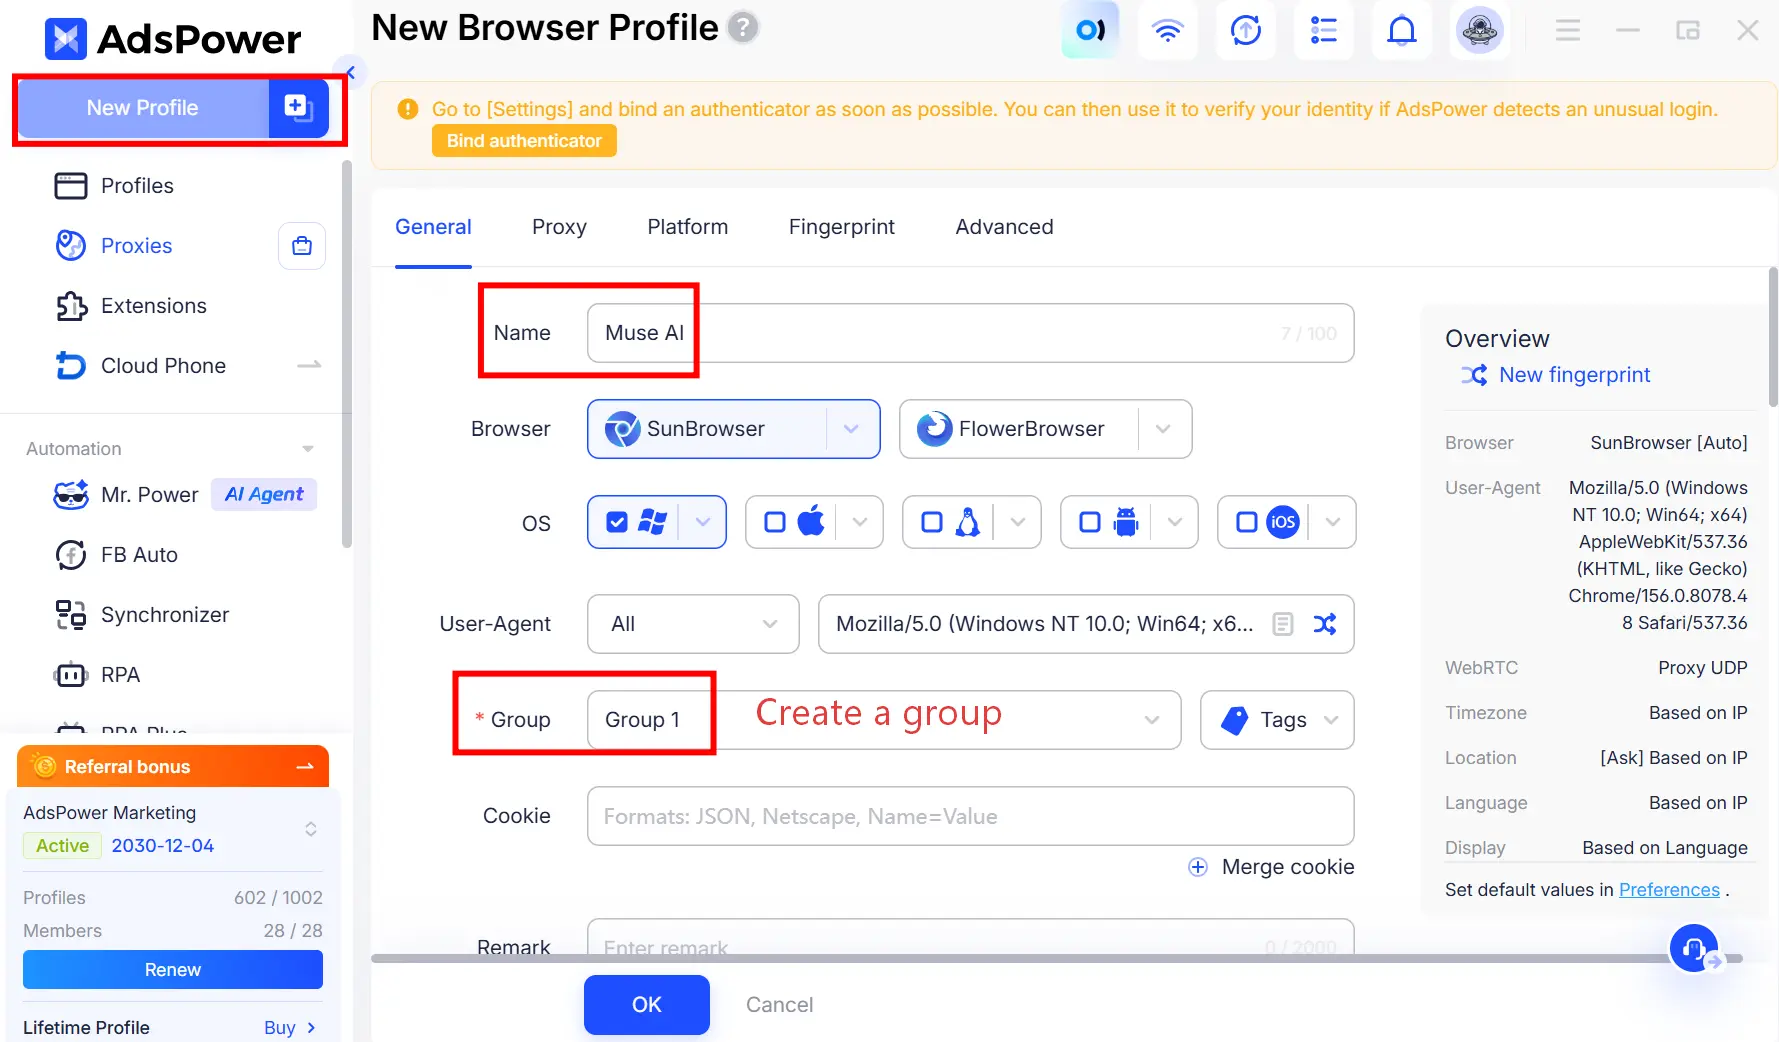
3. Bind the proxy
Under proxy configuration, select "Saved Proxies." Locate the residential IP you just purchased and bind it to the current browser profile. Click "Check Proxy" to verify a successful connection, and confirm that the egress IP and geolocation are within the United States.
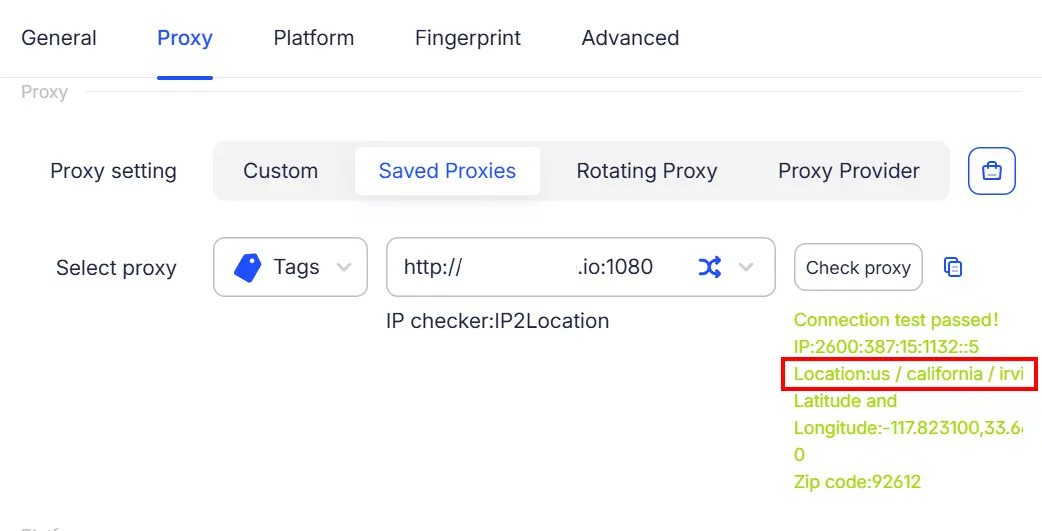
4. Configure browser fingerprint parameters
Set up your browser fingerprint. You may keep the default values. Match the time zone, language and geolocation to your IP to maintain environment consistency, then save the profile.
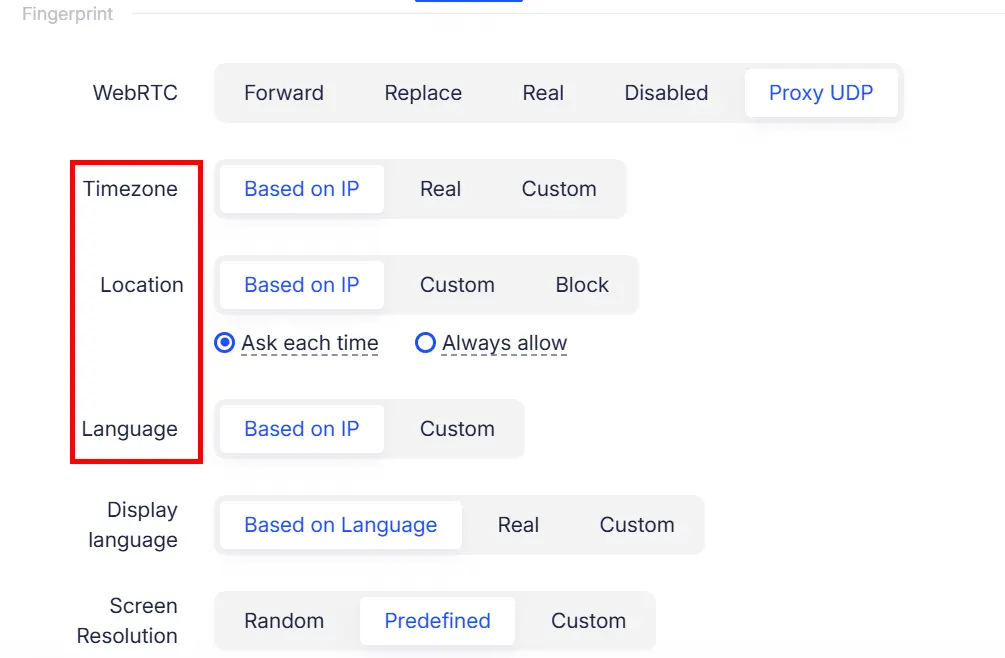
At this point, a dedicated Muse browser profile with isolated cookies, custom browser fingerprint and US residential proxy IP is ready. You can launch this profile directly for future logins to prevent changes to your device and network fingerprint.
5. Register on the official Muse website
On the AdsPower "Profiles" page, find the profile you just created and click "Open".
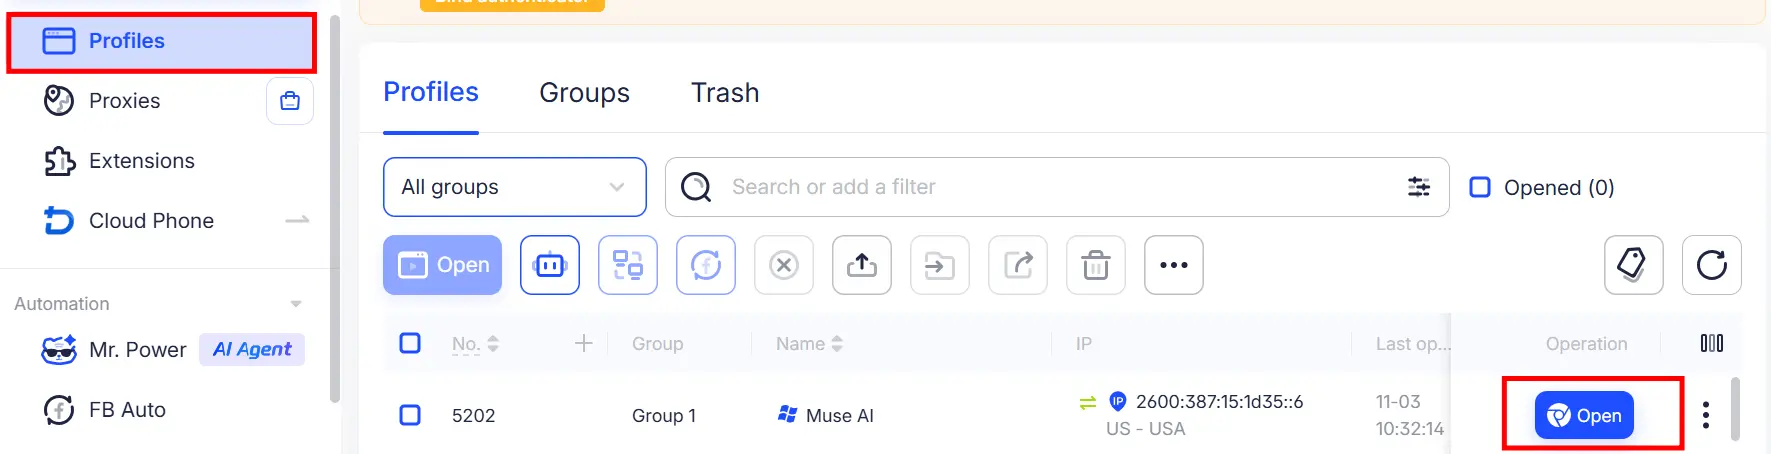
Enter https://muse.ai/ in the browser address bar to access the official Muse site. Submit your email to receive a verification code, then fill in your date of birth (you must be at least 18 years old).
When using a high-quality clean residential IP paired with consistent browser fingerprint and network settings, you may bypass the card verification step and enter the Muse workspace directly.
Note that even with clean residential IPs, registration success is highly random. Some IPs let you proceed smoothly through signup, while others redirect you to a waitlist or enforce additional age verification. Muse evaluates multiple signals beyond just the egress IP, including browser fingerprint, account reputation, and historical profile activity. The same profile may yield different results at different times. It is recommended to prepare multiple distinct residential IPs for testing and prioritize long-term profile stability.
6. Complete Muse age verification
If Muse prompts you for extra age or identity verification, follow the on-screen options to link your Facebook or Instagram account, or complete credit card verification.
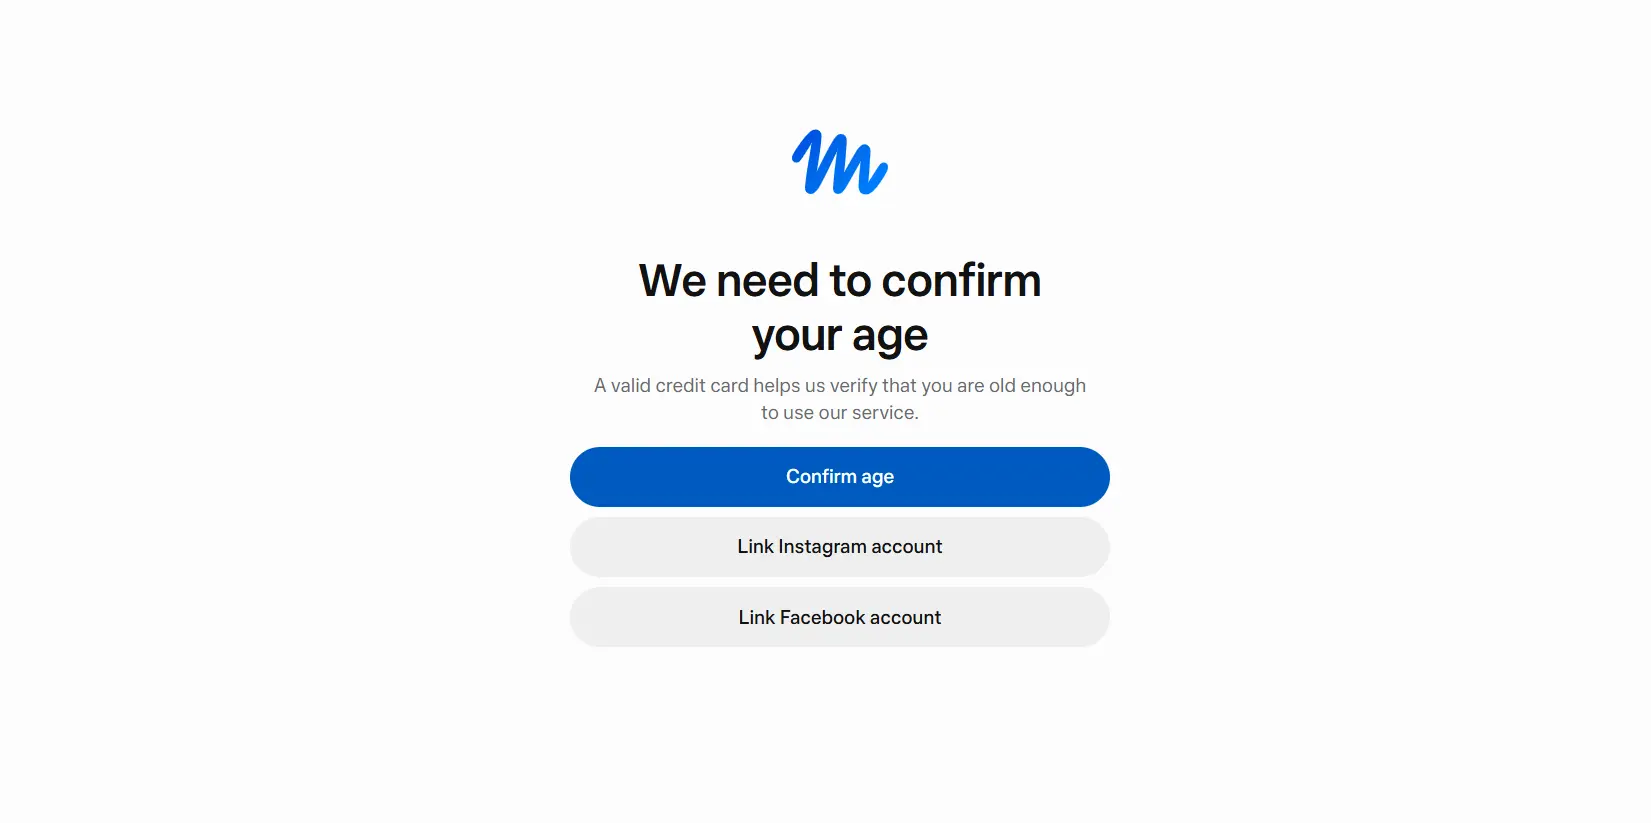
If you select "Confirm age," you will be redirected to Meta’s payment page to enter your credit card details. There are three fields to fill out:
- Card number, expiry date and CVV: enter the information as it appears on your card
- Country or region: select United States
- ZIP code: enter a US ZIP code
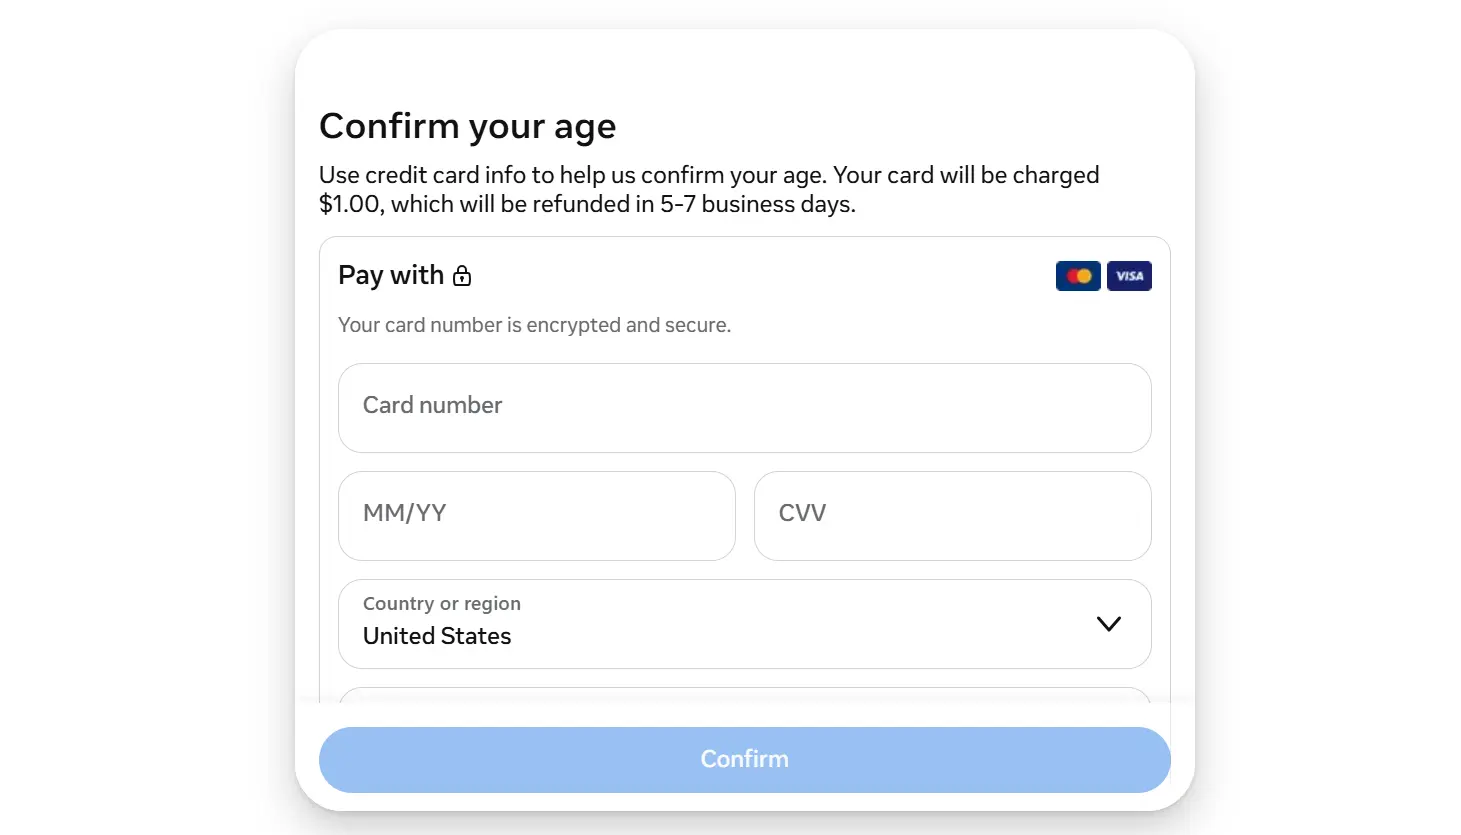
A temporary $1 charge will be made to your card for verification and refunded within 5–7 business days. This is only an age-check confirmation and "not a subscription charge".
If you already have a working Instagram or Facebook account, you may also complete age verification via the corresponding option shown on the page. Should verification fail, first review your account and submitted details following the on-screen prompts. Repeated resubmission is not recommended. If you still cannot pass verification, wait a few days before trying again.
After successful registration, keep logging into Muse using this same AdsPower browser profile. Maintain consistent proxy IP, cookies and browser settings as much as possible. This helps reduce repeated verification requests and account risk controls triggered by frequent device switching, cookie clearing and similar changes.
Method 2: Sign Up for Muse Using Gemini Spark Remote Browser
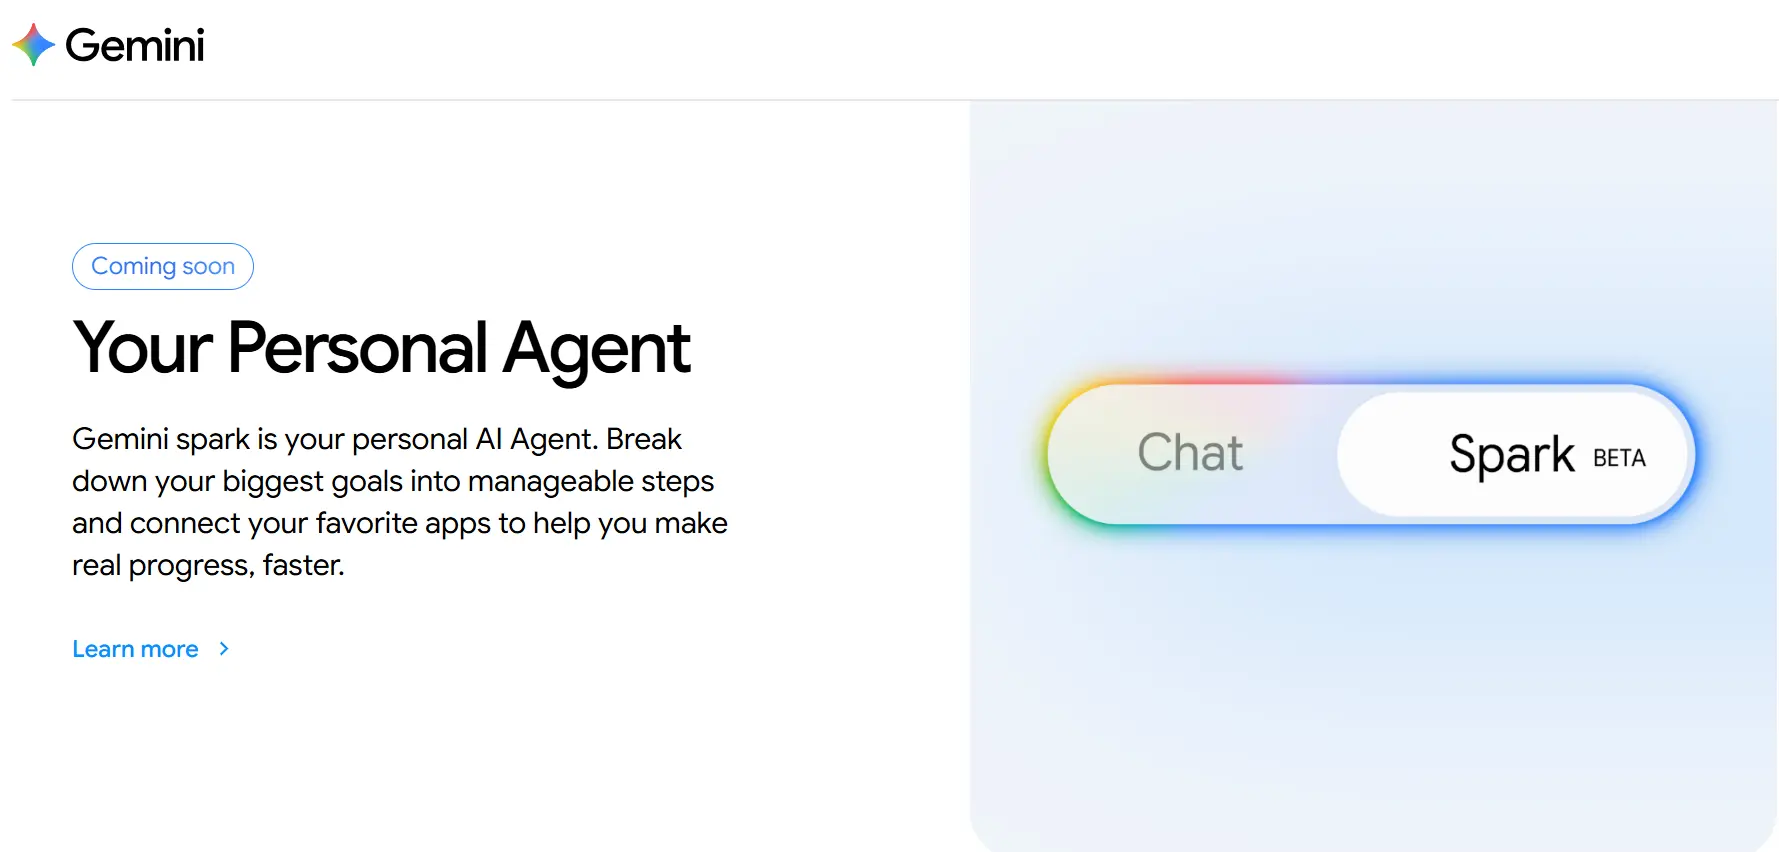
Gemini Spark comes with a built-in remote browser, letting you operate a cloud browser environment from your Google AI workspace. Spark remote browser access is locked behind Google AI Pro or Ultra paid subscriptions. This method works best for users who already maintain this subscription. There is no extra proxy configuration needed, but location and verification checks still apply.
Step-by-Step Walkthrough
1. Access Gemini Spark: Open https://gemini.google.com/spark and switch to Spark mode.
2. Launch the Remote Browser: Enter this prompt in Spark: Use the remote browser to open the Google homepage.
If the remote browser option appears, follow the on-screen prompts to complete required authorization.
3. Take Control of the Browser and Access Muse: Locate the remote browser window in Spark’s task workspace and click "Take over task".
Once you gain browser control, enter this URL in the address bar: https://muse.ai/join
4. Complete Account Registration: Follow the page instructions to enter your email, verification code and date of birth, and finish the mandatory age verification.
Note that this method still cannot bypass Meta’s location restrictions reliably, and you may land on the waitlist.
Method 3: Register Muse on a Cloud Phone
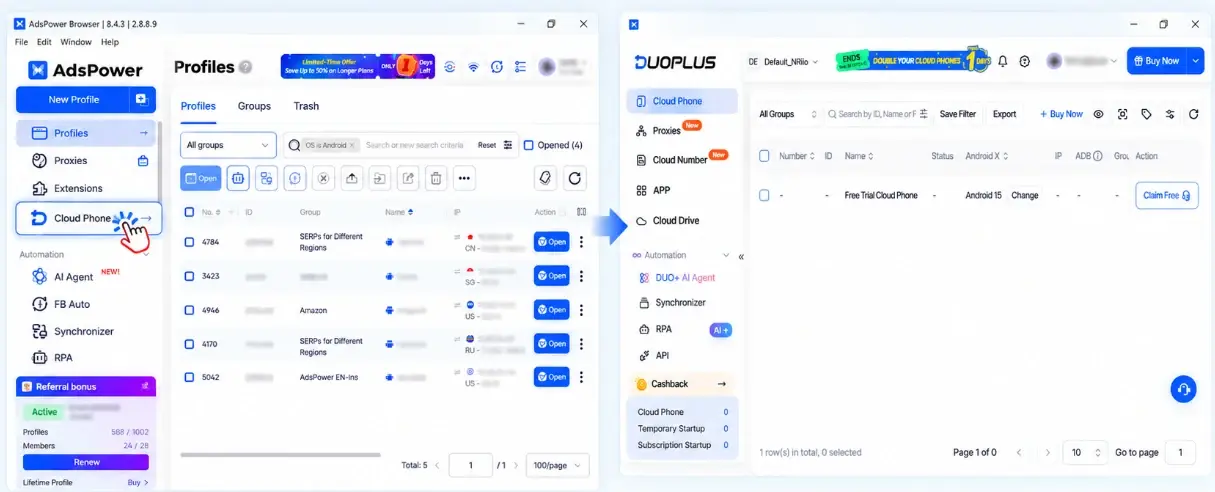
A cloud phone is a virtual Android device hosted in the cloud. Without buying a physical handset, users can remotely control a full mobile operating system from their computers. Take DuoPlus cloud phone as an example: users can create isolated Android instances and customize settings such as proxy IP, system language and time zone. You can access the cloud phone directly within AdsPower.
Step-by-Step Walkthrough
1. Spin up a cloud phone instance and configure your proxy, system timezone and language to match a US location.
2. Open Chrome inside the cloud phone and go to Muse’s official website. Complete email verification and age checks.
3. After successful registration, you can download the Muse mobile app from Google Play and log into your new account.
Cloud phone environments vary greatly by provider. Some cloud phone IPs and device fingerprints are easier to flag, so waitlist risk still exists.
Method 4: Register Muse via DaDesktop Cloud Desktop
DaDesktop hosts remote Windows or Linux machines in overseas data centers. You control the desktop entirely through your local browser, with no desktop software installation required.
Pricing starts around $3 per day. Windows licensing may incur an additional fee. Official site: https://www.dadesktop.com/
Step-by-Step Walkthrough
1. Deploy a cloud desktop instance hosted in the United States.
2. Open a browser inside the remote desktop and visit the Muse sign-up page.
3. Complete the whole registration and verification flow within this cloud environment.
Once your account is created, you can attempt to log in from your local device, though fingerprint and location mismatches may trigger security checks later.
Redeem Invite Code to Get Free Muse Tokens
New users can redeem an invite code within 48 hours after registration. Both the inviter and new user receive a large token package for running Muse agent tasks.
Token Redemption Steps
1. Log into Muse on the web.
2. Go to Settings > General > Usage and locate the invite code redemption field. If you use the mobile app, find the redemption entry inside the Settings menu.
3. Enter a valid invite code and confirm.
4. Return to the Usage tab to check your updated token balance.
Post‑Signup Muse Agent Basic Setup
Once you pass registration, a small amount of configuration helps your agent run smoothly and protects your privacy.
Agent Profile, Privacy & Permission Settings
Customize your agent’s display name and profile information. Review and adjust permission scopes for web access, email and third-party integrations. Restrict permissions you do not plan to use, to limit the data Muse can access.
Still not sure that AdsPower is right for you?
Ask top AI tools to get instant personalized answers for your needs
FAQs
What Can You Do with Meta Muse?
Meta Muse is an AI agent with persistent memory. It can browse the web independently, manage emails, arrange schedules and execute chained automated workflows without constant manual prompts.
Is a Credit Card Mandatory for Sign-Up?
No. Meta shows different verification options dynamically. You may verify via a linked Instagram or Facebook account when available. A credit card is only one possible verification route.
Does Creating a Muse Account Incur Charges?
Sign-up itself is free. New accounts come with a default free token quota that resets weekly. You may upgrade to a paid subscription for higher limits if you run heavy agent workloads. Subscriptions can be cancelled anytime.
What Languages Can Muse Operate In?
Muse supports instructions in many mainstream languages. You can send prompts in English, Spanish and more. Some integrated third-party services may retain their original interface language.
Conclusion
We have laid out four tested approaches for Muse registration. The AdsPower fingerprint browser paired with a US residential IP remains our top recommendation if you want stable long-term access and multi-account management capability.
All these setups rely on environment matching to satisfy Meta’s access rules. Remember that detection policies change regularly, and no method guarantees success. Always evaluate account risks before you proceed.
