
How to Rotate Mobile Proxies in AdsPower (Using Astro as an Example)
Take a Quick Look
Master the art of mobile proxy rotation with AdsPower and Astro—boost your online anonymity and efficiency in just a few clicks!
Today we will walk you through the process of configuring a rotating mobile proxy in AdsPower. After a few simple settings, rotation can be performed with one click, which is extremely convenient for all users who use mobile proxies.
We used the proxies of our Astro partners as an example this time, but you can use any mobile proxy you want. Our partners offer HTTP and Socks5 proxies, and we will use HTTP.
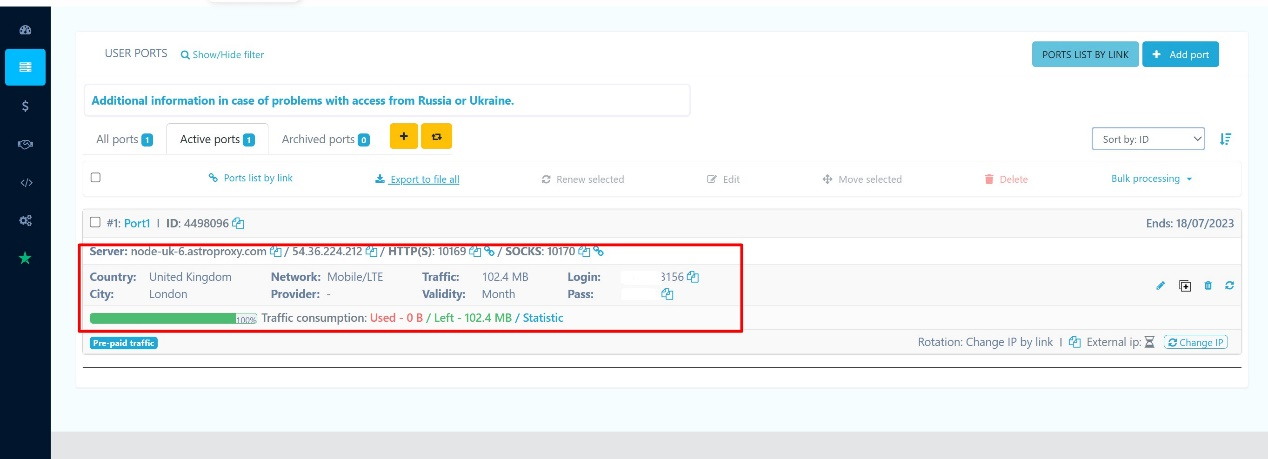
Unfortunately, the format will not match if you copy the proxies directly into AdsPower. If you only have one or two proxies, you can quickly make them look right. To accomplish this, create a link in the following format: http://1:2:3:4 (as shown in the screenshot below) and paste it into AdsPower.
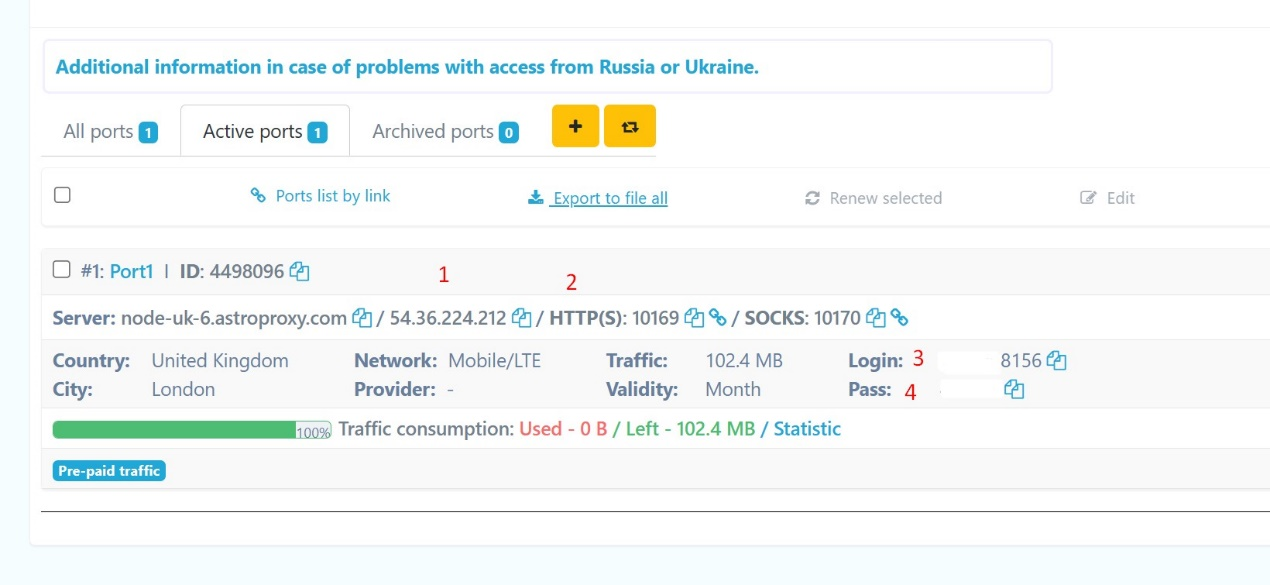
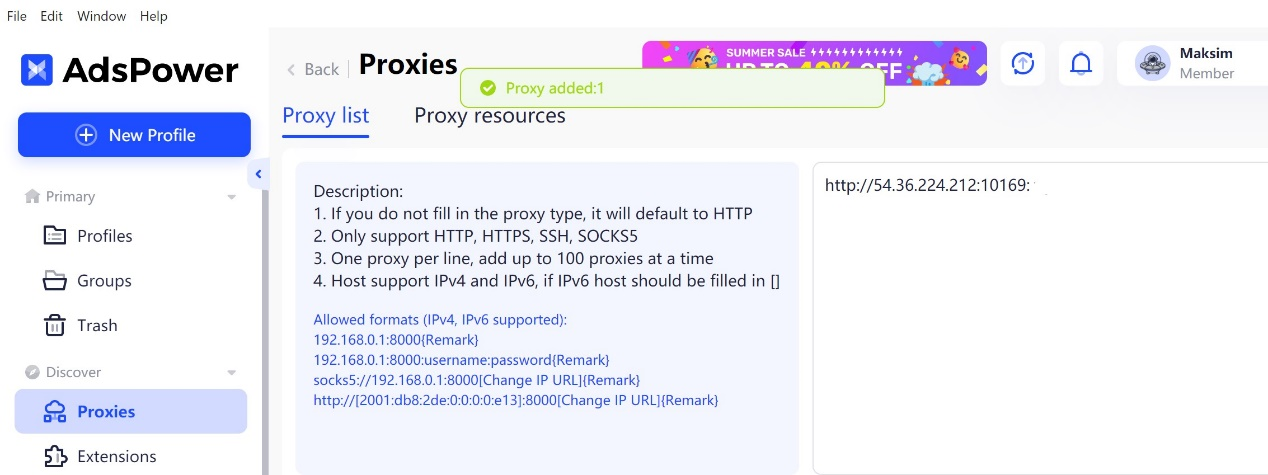
Insert the resulting link in the "Proxies" section in AdsPower. Then, add the proxy and press OK. If the format is correct, a green notification will appear at the top.
You will also need a connection to the External IP. This is the URL you use to rotate your proxies directly. As shown below, you can copy this link from the proxy service's dashboard with a single click.
Then, in AdsPower, go to the "Proxies" section, select the proxies you've added from the list, click the "Change" icon on the right, and paste the link into the URL field for further rotation.
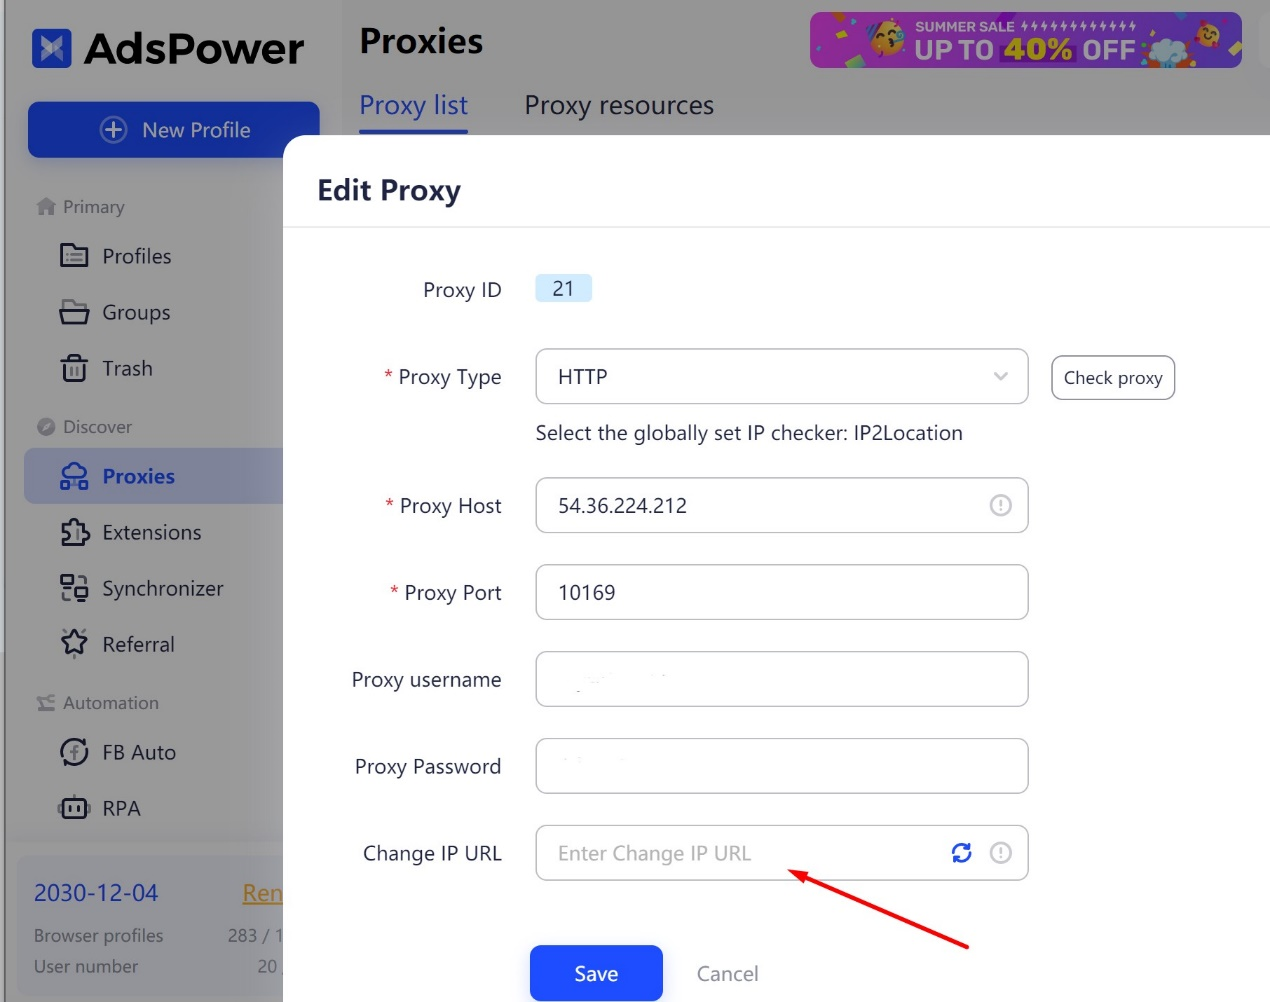
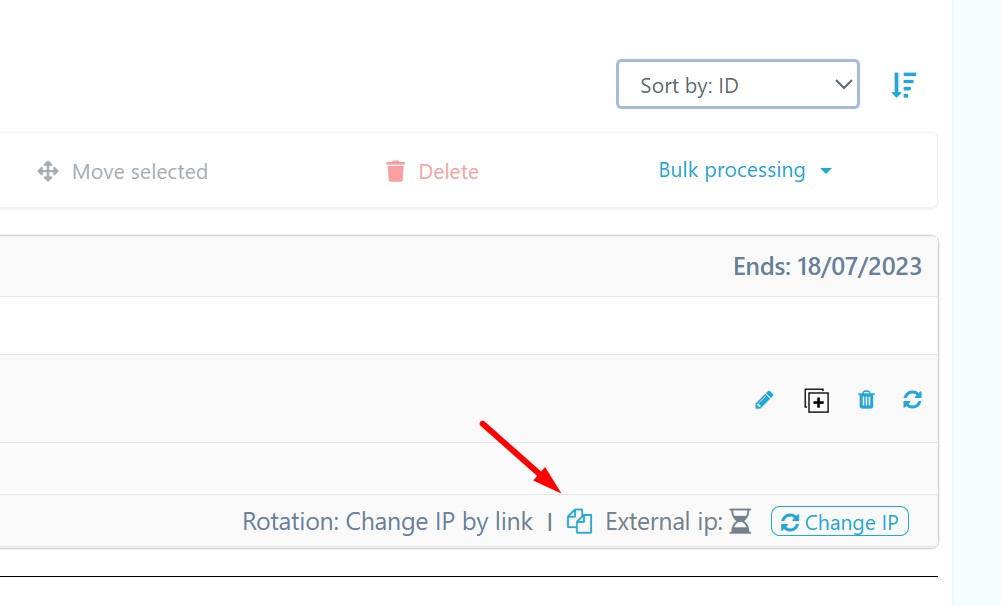
After you add the link, you'll see an icon for changing the IP address, which you can use to perform one-click rotation. This is how a successfully completed action will look.

Just in case, after starting your browser profile, double-check the IP address displayed. You can verify this on any IP checker website.
Bulk upload proxies
You can upload all proxies in bulk using a file exported from your Astro dashboard. Following that, they can be easily added to AdsPower. To get the proxies in a suitable format all at once, enter the following template into the Template field:
{proto}://{ip}:{port}:{login}:{password}
{link}
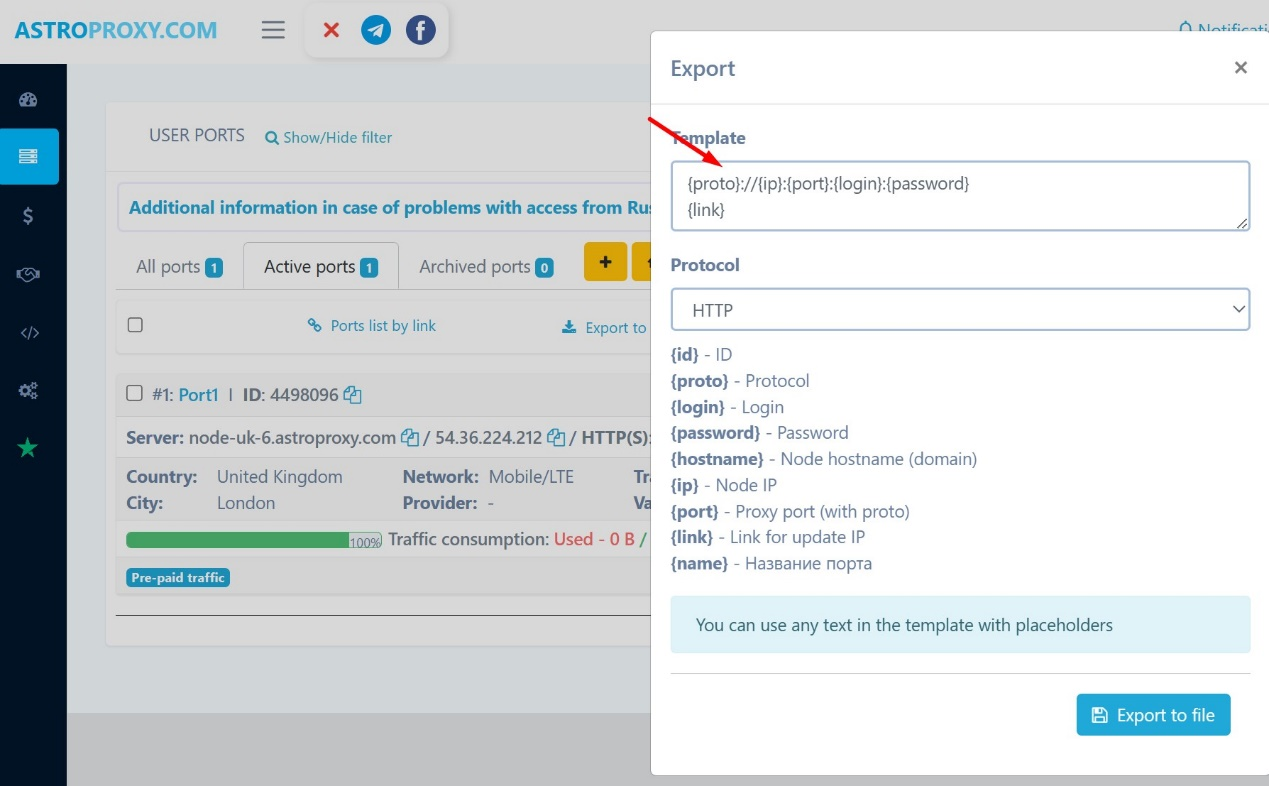
After inserting your proxies, click "Export to file", and all of them will be saved to a txt file. The first line is a ready-made proxy link. The URL required for rotation is on the second line.
With the ordered information in that file, you will be able to add all proxies together in AdsPower's "Proxies" section (no more than 100 at a time). Alternatively, when creating new profiles in the Batch Import tab, you can use a template Excel file.
We hope you found it useful!
")
People Also Read
- IPcook Review: A Practical Proxy Option for AdsPower Users

IPcook Review: A Practical Proxy Option for AdsPower Users
Discover why IPcook is the go-to choice for affordable proxies. Learn more about its high-quality residential, ISP, and datacenter proxies in review
- Top 7 Facebook Agency Ad Account Providers in 2026

Top 7 Facebook Agency Ad Account Providers in 2026
Looking for the best Facebook agency ad account to scale your campaigns? Here are the top 7 providers, including high-trust options for every budget.
- Why Meta Agency Ad Accounts are the Ultimate "Cheat Code" for Scaling

Why Meta Agency Ad Accounts are the Ultimate "Cheat Code" for Scaling
Learn how Meta Agency Ad Accounts help advertisers scale faster with fewer restrictions, while AdsPower improves account management and stability.
- How to Manage Multiple Social Media Accounts Safely in 2026: The Complete AdsPower Guide

How to Manage Multiple Social Media Accounts Safely in 2026: The Complete AdsPower Guide
Safely run multiple social media accounts in 2026 with aged accounts & AdsPower anti-detect browser. Master fingerprint isolation, proxy setup
- IPRoyal Review 2026: A Proxy Solution for Modern Multi-Accounting

IPRoyal Review 2026: A Proxy Solution for Modern Multi-Accounting
Explore our IPRoyal review 2026. Learn about IPRoyal pricing, proxy safety, and how to use these ethical residential IPs with AdsPower for secure mult
